
My wife and I had been living in our home, with children, for a number of years and decided it was time for general improvement of the basement. The basement was basically roughed-in but nothing was done beyond what was required for the basic requirements to satisfy the building code. It was not a living area for our home and we wanted to create a living area for our family to enjoy.
Experience
After much careful thought, I decided to proceed with the project on my own. I had some home construction experience, from many years back, working with my dad as part of his construction company, Equity Builders, in Lorain, Ohio. My father was an exceptional carpenter and I gained a great appreciation of carpentry and general contracting working with him. I also have an undergraduate degree in electrical engineering–so the electrical elements of the project came along reasonably easily for me as did the general construction. I did have to do some research on building and electrical codes to make sure everything I was doing would be within the limits of building codes in my area.
The advantages of DIY include:
- Saving a considerable amount of money
- Ability to provide a great job for my two sons to learn and earn money.
- Everyone learning lots of new concepts and skills
- Remaining in complete control of the job along the way
The disadvantages of DIY:
- Taking more time to complete the project
- Spending a few hundred, or so, hours of my time in the basement instead of doing other things
Warning…
If you decide to try a basement improvement project on your own make sure you do enough research to understand what you are getting into. Find some experienced people to talk with about the project if you do not have enough experience yourself. Plan the project in phases and celebrate the completion of each phase. If you are unsure about anything you are doing, then get some help. It can be very costly to have to tear something apart because it was not built properly. There are also many dangers that you will encounter in the building process–power tools, adhesives, paints, electrical distribution components, etc.. The risk of getting seriously hurt goes up dramatically if you don’t know what you are doing. Most importantly you want to end up with a safe living environment when you are done–so pay close attention to building, electrical, and plumbing codes–think seriously about these and don’t be afraid to spend some extra money to make sure the new living environment is safe.
If you do not have experience consider doing some smaller jobs first, then gradually working your way up. Perhaps even helping a professional complete a job, as a part time learning experice. You can offer your help for less, as a means to gain valuable part time on-the-job experience.
Site Considerations
When we had our home built, we specified deeper 13 course block basement with the thought that we might eventually improve the basement into a living area. The distance from basement floor to upper level exposed floor joists is about 8 ½ feet. Having the deeper basement allowed enough room to build soffits and ceiling into the basement yet provide for a generous amount of head room. The cost of the additional row of block for the basement, at the time the home was built, was around $400–a worthwhile investment. The basement has a generous amount of open floor space free from utilites above it. It is very dry and we have never had any water issues. The home is built on one of the higher level lots in the development.
Getting Started
To get the plan started I created a drawing using a CAD tool. I picked an open source tool called LibreCAD to do the drawing. I spent several weeks just drawing, correcting, sketching, and planning what improvements would be made and how to accomplish the task. My original drawings had a small kitchen included, but that was scaled back because of space and cost concerns. Once we had an aggreable plan, I procrastinated for a few months, then began doing the work. I have done most everything so far, with some occasional help from a few of my friends on some of the larger and/or heavier tasks–such as the drywall finishing. I also had my 15 year old son help me, who learned many skills while doing so. I learned quite a bit also, and continue to learn as I work to complete the project. My older son is also helping me now, when he can, and is also learning much about building.
Proceeding to build
With the improvement plan drawing complete, we now have the confidence needed to move forward. We are now in the build phase of the project. We are working the project in phases and decided to leave the last phase, the bathroom, for a later time–much later. Work has not been moving as quickly as I originally expected but we are making steady progress–it is a rather large project for one person. It has become a regular part-time weekend job. I am doing most of the work on my own with some help occasionally from my two sons.
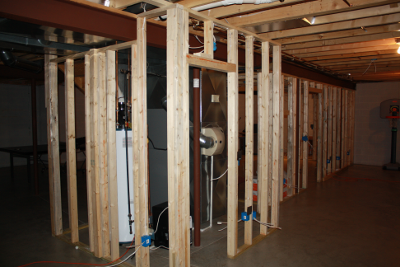
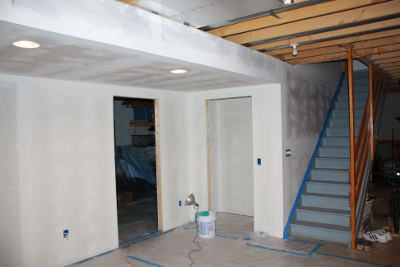
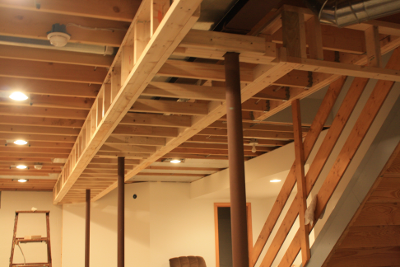
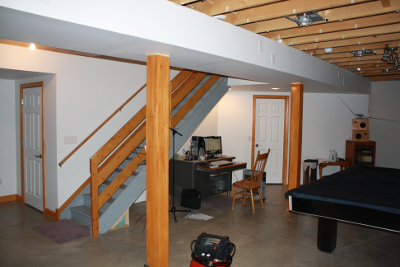
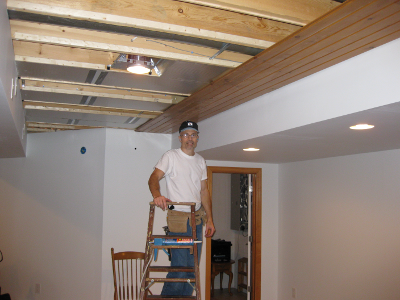
Below is the framing work for the first build which divided the basement into entertainment and utility space.
The plan calls for more electrical capacity in the basement–a lot more. The main panel is nearly out of slots. Here I have added a side-car distribution panel for the finished side of the basement. It will carry the 240V baseboard heater load, wall outlets, and light utilities for the finished side of the basement.
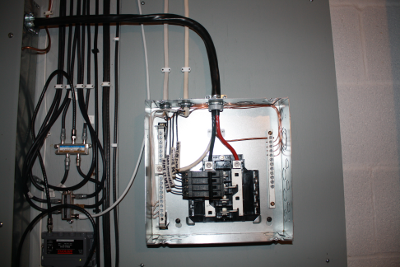
The side-car distribution is operational. I have a bit more work to do on it. I still need to tie the romex down with some staples and complete the layout document sheet on the inside of the door.


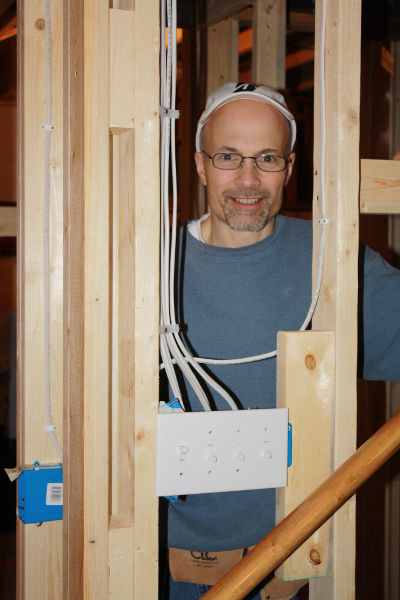
Here we have our friendly home electrician–me. The switches in the 4 gang electrical workbox all operate perfectly. A happy camper indeed…
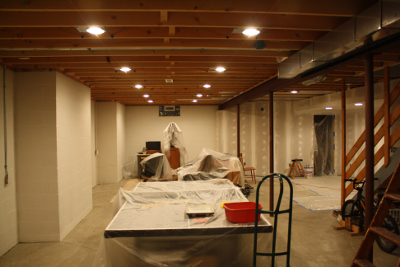
With the electrical rough in complete, we can begin to mud, sand smooth, and then prime-coat the walls. Dry wall and finishing is labor intensive and very messy. This was about as big of a drywall job as I could put up with and I got some help on the finishing work from my brother in law. The job seemed to take forever and was very messy.
Here you can see the positioning of the recessed lights on the finished side of the basement. Note the mason string line used as a guide to position the lights in two parallel lines across the basement. If you want a straight line, use a very taught string.
On to the prime coat and finish woodwork. We still have a few places on the walls that need a bit more more attention. I am waiting to do the final touchups until all the woodwork is complete. I found that the installation process for the finish woodworking occasionally tends to ding up the walls here and there. One final fresh coat of paint near the end of the project should take care of everything.
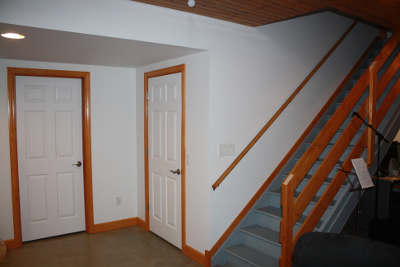
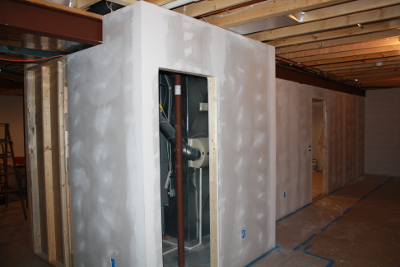
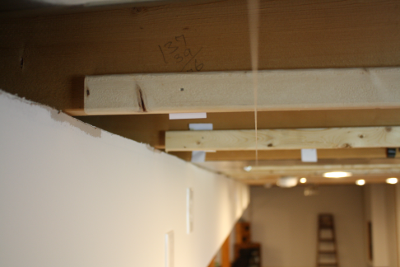
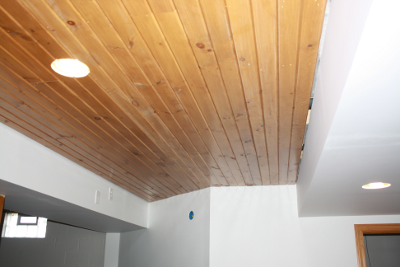
Here we are now below, into the second build which adds a central soffit to cover the overhead beam and air ducts and finished walls to cover most of the foundation. The second build will complete the division of the basement with an addition of another internal partition with a doorway. The goal for the second build is to complete the living area ceiling, walls, and woodwork–bringing it into full completion except for the floor. Part of this second build is now complete with woodwork and finish work complete. Note the recessed ceiling lights.
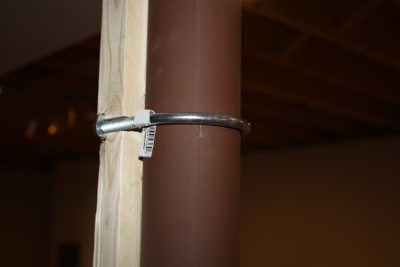
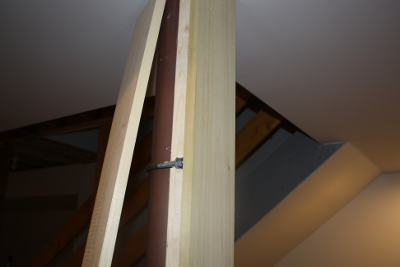
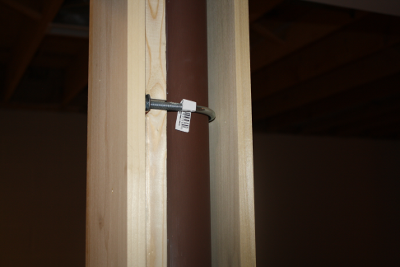
Now we move on to finishing the ugly support posts. We use a combination of a level and a keen line-of-sight to make sure the support posts are aligned with each other and plumb before we start–they are. I cut some 2x4s to length and run a shallow angled groove down the center. I use two heavy U-bolts on each post to clamp a 2x4 onto the post–then apply adhesive. We take special care to use only straight 2x4s, and align their surface at the proper position on the post to be parallel with the room wall. This provides a rock-solid and truly aligned nailing surface for the first piece of poplar 1x8 woodwork which is glued and nailed onto the 2x4. We make sure to use a level to plumb the first poplar 1x8 for a good start on each post.
With the first piece nailed and glued directly to the 2x4, we now work our way around the post, nailing each edge of the 1x8 poplar to the edge of the previous piece with a 15 gauge nail gun…
Afterwards, we fill nail holes using Minwax Woodfiller, then using a sandpaper stapled to a large wood-block - a sanding block. We sand all of the surfaces first with course, then with fine sandpaper. It takes lots of sanding to get it just right. We dont want to see any machine marks or feel any mis-aligned joints. The finished product is worth the effort. We still have trim to complete at the top and bottom of the posts and will get to that after the ceiling is complete.
The posts are looking great so far and you can also see how the central soffit finished out. The paired electrical workboxes in the soffit are one for electrical supply and another for DMX computer light interface–added to the project for fun and entertainment–this place is eventually going to rock!
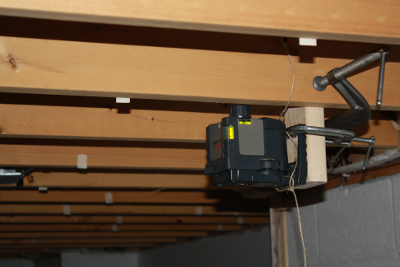
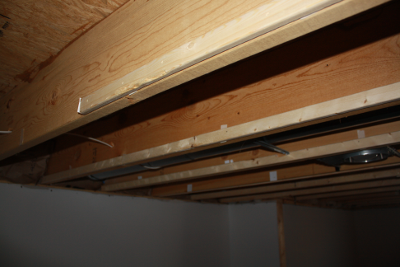
We are now getting ready to apply the ceiling material on the uppermost ceiling surface at the floor joists, which will be a tongue-and-groove solid wood SPF siding product. The ceiling material will be nailed to a sub-ceiling that we build out using 1.5” x 0.75” firring strips. Below we are using a laser level–my friend Rich loaned it to me. The masking tape markers are carefully stuck in place, using the laser level, to the desired position for the sub-ceiling–very close to the the floor joists. The folded tape ends provide a perfectly flat guide for the sub-ceiling nailers which will be glued and nailed to the level of tape markers.
Trying to forgo the firring strips and nail the ceiling directly to the floor joists would create far too much height variation in the finished ceiling because the bottoms of the floor joists are not leveled perfectly with each other. Floor joists tend to be crowned and flat to various degrees. Their with can vary in some cases. Loading on the upper deck can cause some variations as well. The firring strips make it all come out perfectly flat.
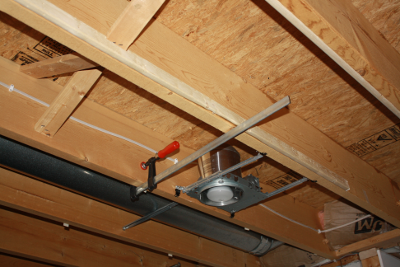
Here the sub-ceiling nailers are going into place at the exact position the masking tape markers were hung. This effectively flattens the ceiling in preparation for the finished product. The clamp was used as a helping hand to hold up the nailer while it is being positioned and nailed.
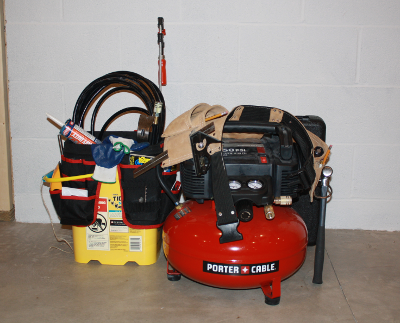
I like to keep the tools together and organized. This helps prevent me from spending too much time in search of tools that were left laying around.
Using a 15 gauge nail gun really saves time. You can see how the clamp is used to make handling and aligning the material much easer while nailing it.
More sub-ceiling nailers going into place. The entire sub-ceiling is coming out perfectly flat–just what we need.
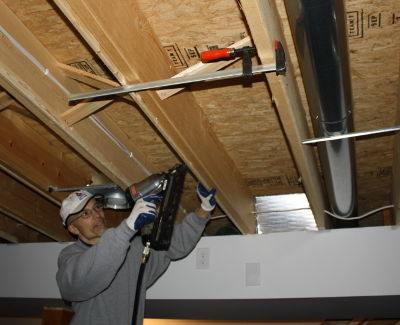
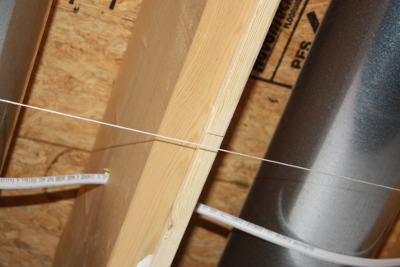
We use a string to mark and position the first piece of ceiling material. A tight string does not lie–it gives you a perfectly straigt line to work from.
We transfer the line produced by the string onto the subceiling nailers. This line markes the position for the first piece of ¾ inch ceiling material. We want to get a perfectly aligned and straight start–to which the remaining material will be aligned to. We could have used a chalk line but I didn’t want to bother with blue chalk dust cleanup afterwards.
Here is the start on the ceiling for one section of the basement. The material is nailed using 2 inch 15 gauge nails driven from a Senco nail gun. First piece is spot glued and nailed on both edges of the material–we want a good foundation piece that will not move. The second and remaining ¾ inch SPF material is spot glued and nailed at the leading edge, just behind the tongue, to the sub-ceiling nailers. The job is rather cumbersome and requires two people to position, hold, and nail each piece into place. The ceiling is extremely solid–you can bounce a basketball against it. It adds to the stiffness and structure of the flooring system directly above it.
The natural wood is really looking great so far. The edges will be eventually be finished out with crown molding, nail holes filled, and a final coat of finish will be applied to the entire ceiling. This is the small section of basement ceiling. On the other side of the soffit the ceiling area is at least 3 times the size of this one. …we still have lots of ceiling work to do.
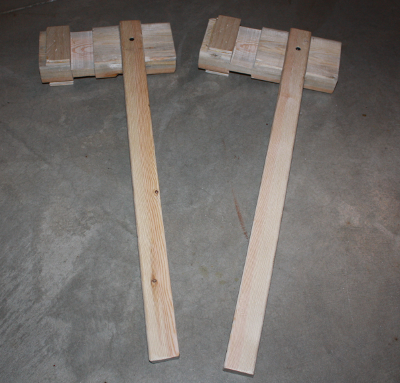
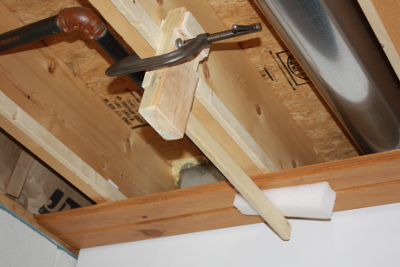
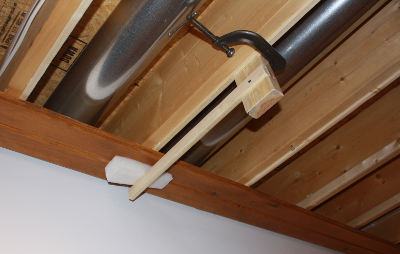
Getting back to working on the ceiling I find that I am working mainly on my own. I decided to make a set of support brackets to help install the ceiling material on the larger side of the basement. I need something to hold the material in place with enough force so that it will stay in place and allow me to adjust it before nailing it. What I learned from working on the smaller side is that it is very difficult to hold the first piece and others in place before nailing them. These brackets below will allow me to position and secure the piece before nailing it. I took some quick measurements and spent 30 minutes or so making these from scrap material. The bracket is designed to slide along the sub-ceiling nailers.
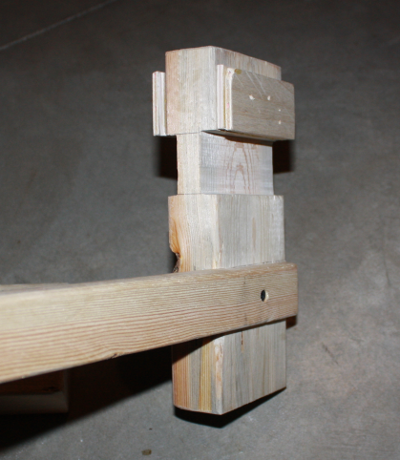
You can see how the foam wedge provides enough force to hold the material firmly against the ceiling. This is great. It allows me to carfully align the material before nailing it. I am just getting started on the first row of material on the larger section of ceiling.
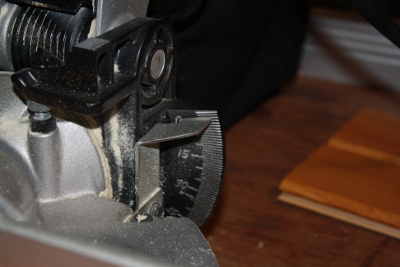
All of the end cuts are made on a compound miter saw. I really like the DeWalt–it is easy to use and cuts perfectly.

I have the saw set to undercut each piece by a few degrees. This helps prevent visual gaps when butted to another piece of material.
The first row of material has been spot-glued and nailed in place. It is looking as straight as the string we used earlier to mark the position. Using the support-brackets made a big difference in the amount of effort. It takes me far less effort now, working alone, than it did earlier with two people trying to align and muscle the material around without the bracket.
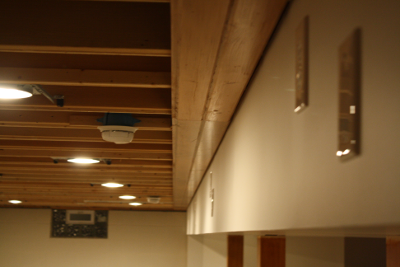
After completing the open ceilings, we will be adding crown molding and finishing out the woodwork down the walls and at the floor base. Although we still have lots of work to do to complete the second build, the basement living area is starting to look like a great place to hang out.
Stay tuned for more as we complete the project…
document date: 2013-04-30
