Driving down the street at night and wondering why I can’t see the road the way I used to be able to. Are my headlamps on?
I am posting this information with hope that it might help others who are experiencing the same problem I had. If you find it of good use, please drop me an email to let me know. Please read the disclaimer at the bottom of this document.
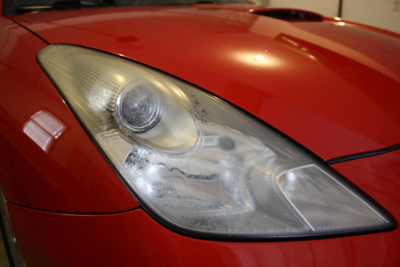
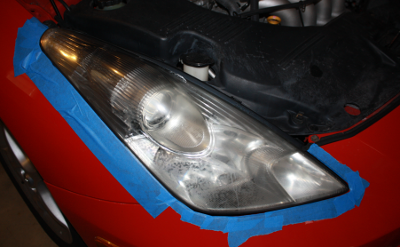
Does your headlamp lens look cloudy and dull–like this one? :)
Forward
In this article we illustrate a solution for the embedded dirt, grime, and chemical residue, that builds up on the surface of the acrylic headlamp lens.
Problem described:
The headlamp lens on my daughters 2000 Celica GTS has been looking very cloud for a few years now. It has become rather frustrating because it interfers with the performance of the headlamps on the car. The headlamp system on the Celica is top-notch when it is working properly. The problem is that the clouded headlamp diffuses the light and reduces the illuminating distance of the headlamp system–this impedes night driving and can be unsafe. It is also very frustrating to look at after cleaning and waxing the otherwise great looking car. It stands out like a black eye on the poor little Celica–we gotta fix it. :(
Upon close inspection, it appears the the clouding of the lens is mostly, if not entirely, on the outside surface of the lens.
Possible solutions:
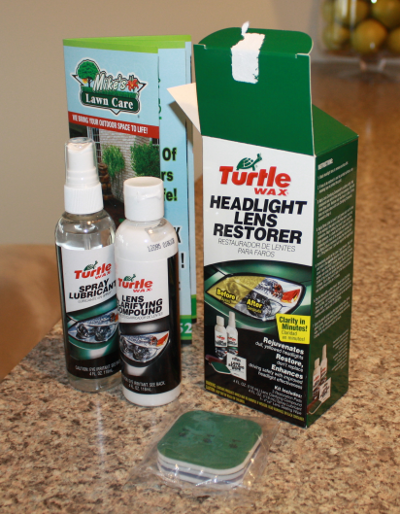
The guy at AutoZone suggested to my daughter that she try a lens repair kit. The kit is from Turtle Wax, and is called “Headlight Lens Restorer”. It costs about $10.00. She came to visit this weekend and brought the kit with her. We decided to give it a try. I must say I was a little skeptical at first, but afterwards I was totally blown away by the results.
Repairing the lens
Here are the steps we went through to restore the headlight lenses, both of them, on the Celica. It was very easy and took only a few minutes…
Below is the Turtle Wax kit my daughter brought home from AutoZone.
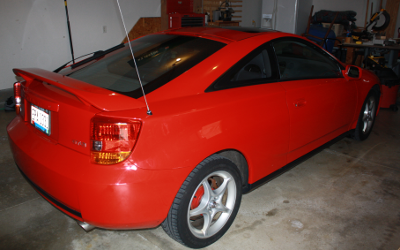
Below is a shot of the Celica GTS, looking just great from the rear.
But low and behold, the view from the front shows the ugly, dull, headlamp on the passenger side.
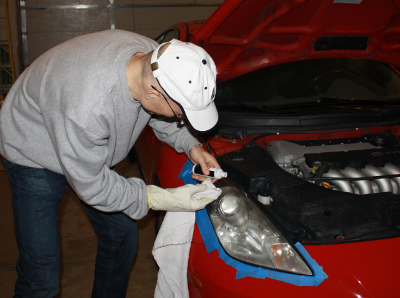
Following the instructions, we tape off the body surrounding the headlamp to prevent any damage to the paint on the vehicle.
Following the instructions, and using an old towel, we first try to use the white polishing agent provided in the kit. With just a bit of polishing effort, the grime embedded into the lens surface starts to immediately show up on the towel–wow great!
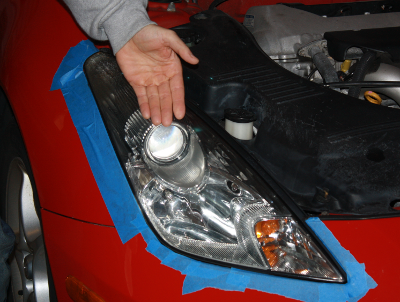
Afterwards we applied the acrylic sealer provided in the kit using the small application cloth provided. The headlamp lens looks like new again. It was simply a remarkable transformation–like NEW again! Crystal CLEAR! It has not looked this great since we purchased the car. My daugher and I are both amazed at the results!
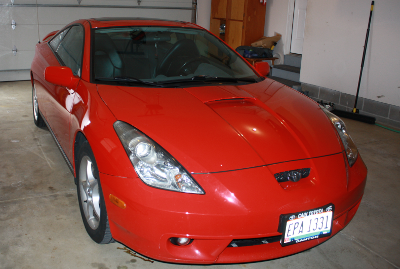
…and now we have a great looking front view of the Celca GTS!
Summary
Although the kit came with some additional products for sanding out and refinishing the headlamp lens, the only parts of the kit we used was the white polishing and cleaning agent and the acrylic sealant towelette. I highly recomment this product. It is well worth $10.00.
BTW–A single new headlamp lens for the 2000 Celica GTS will run you about $270 from the dealer.
Disclaimer:
The information provided here is not a suggestion or endorsement that anyone should attempt to perform the activities shown or described. This information is provided as-is to show how I solved the problem described. Any repairs you make to your car, or someone else’s car, are done at your own risk. The author assumes no responsibility or liability for the actions of others or the results obtained or problems encountered, including loss of any kind, from use of the information on this site.
In other words; You better know what you are doing before trying your own repair work. If you are unsure as to what you are doing, then seek out a qualified mechanic to perform the work.
