Linux Mint is one of my favorite Linux desktop distributions. It comes in a multitude of flavors designed to drop into just about any desktop or laptop system available. It installs and updates in minutes and delivers a fully functional system with a full set of common and very useful applications–everything that most any user would need. The latest version 17.1 is a long term support (LTS) release which means it is supported for 5 years. Linux Mint is my go-to distribution for desktop Linux. The folks on the Linux Mint team have been doing a phenominal job, release after release, since the project started several years back.
Here we provide instructions for adding the KVM hypervisor and VM management tools to the Linux Mint 64-bit install. The Linux Mint system becomes a virtualization host. In a few minutes, with just a few commands, you can have a rock solid virtualization hypervisor added to your Linux Mint desktop system. You can use graphical “virt-manager” to create virtual machines and manage virtual networks. You can use the Spice protocol to offer high performance virtual desktop interfaces (VDI) both locally and to remote clients. Having the advantages of virtualization added to your Mint desktop provides some serious benefits for developing, testing, experimentation, or providing remote virtual desktop interface (VDI) services to others from your Linux Mint system. Virtualization also allows you to keep your main Mint desktop system clean and shiny while you use disposable VMs for software testing, experimentation, duplication, and validation.
You will need a system with some horsepower if you plan to run mulitple virtual machines and/or provide access to them from remote clients. The system processor must be capable of hardware based virtualization. A high end AMD (Athlon 64, A8, A10, or higher) or Intel system (I5, I7, Xeon, etc.) should provide this capability. Here is a good article from superuser.com on identifying processor virtualization. Any memory or processor resources provided to a VM while it is running will reduce the capacity of the virtualization host system. If you plan to have one or more resource intensive VMs, then you will need to provide enough processor, memory, and storage resource in your main host.
Basic installation and update of Linux Mint
Install Linux Mint 17.1 64-bit Cinnamon desktop from CD or USB. I won’t get into the basic install details because there is plenty of information available on this and it is quite simple to install on just about any system. Select the installation icon on the desktop and follow through–this takes only a few minutes. In a flash you are ready to proceed with your shiny new Linux Mint system.
Open a terminal on the desktop. Perform an initial update to bring all of the components up to the latest available revisions.
$ sudo apt-get update
$ sudo apt-get upgrade
Secure shell remote client access to the Linux Mint system
If you want to provide for remote management of the Mint system then add openssh secure shell server. This will provide for secure remote client access and secure remote file transfer to or from the Linux Mint host.
$ sudo apt-get install openssh-server
Adding the hypervisor and related components
Now we begin adding the KVM hypervisor, Qemu emulator, libvirt management components, and graphical “virt-manager”
$ sudo apt-get install qemu-system
$ sudo apt-get install qemu-utils
$ sudo apt-get install libvirt-bin
$ sudo apt-get install virt-manager
We want the ability to provide accelerated video to any connecting clients, so we add the SPICE client kit and virt-viewer. Virt-viewer is a view client which connects to either VNC or SPICE desktop video connections. It is similar to a RDP or VNC client, but SPICE is much more versatile because it connects at the VM console through the hypervisor. It provides far more control over the VM guest. Consider that the guest can have networking misconfigured and you can still log into the VM console through SPICE or VNC.
$ sudo apt-get install python-spice-client-gtk
$ sudo apt-get install virt-viewer
Providing access to the hypervisor - the libvirtd group
With all of the components installed, all that is left to do is add any user who will be connecting to the hypervisor into the libvirtd group. Upon the next login, the user will be able to run virt-manager, connect to the local hypervisor, and create and manage VMs.
Managing VMs using the virsh command line
VMs can be managed using graphical virt-manager, or through the command line using virsh. Here is an simple example session of listing available VMs and showing their current state.
zuser@zbox00 ~ $ virsh list --all
 Id    Name                           State
----------------------------------------------------
 -     crunchbag-linux_00             shut off
 -     win-server-2012-r2             shut off
 -     win-server-2012-r2-template    shut off
 -     win7pro-spice-01               shut off
As you can see, they are all shut off. We start two of them using virsh at the command line…
zuser@zbox00 ~ $ virsh start crunchbag-linux_00
Domain crunchbag-linux_00 started

zuser@zbox00 ~ $ virsh start win7pro-spice-01
Domain win7pro-spice-01 started

zuser@zbox00 ~ $
Managing VMs using the graphical virt-manager
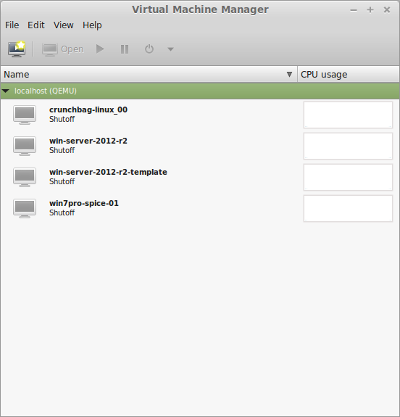
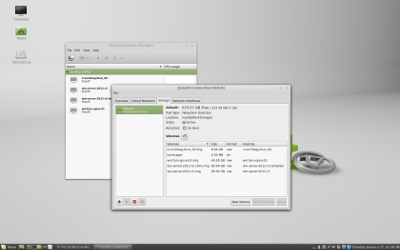
VMs can be graphically managed using virt-manager. Here is a screenshot of virt-manager in action. The virt-manager application provides a very easy to use graphical interface which allows you to manage VMs and other virtual resources. You can also create virtual networks and adjust network backings, monitor resources, etc.

Using Linux remote-viewer, or Windows virt-viewer allows you to connect to the console via VNC or Spice display port on the VM. This provide a virtual desktop interface (VDI). Spice provides accelerated performance to the desktop over the network.
VDI - Accessing the VM guest’s desktop through a remote, or local, client.
The VDI experience is very fluid and provides excellent throughput for doing CAD and other graphics intensive work. In this case the VM is located on the localhost Linux Mint KVM hypervisor, but this VM guest desktop can be provided anywhere we need it via Spice connection on the local network. In most cases network bandwidth of only a few megabit is all that is needed.
The user of the desktop VDI needs only the viewing client, they do not need access to virt-manager. Access to the console, through the client, can be protected using a digest password and will require separate login with account credentials to the VM guest. It looks just like a physically connected console–if you restart the OS guest in the VDI you can watch it reboot with BIOS screen and boot to running system. With installation of libvirt guest OS tools we get auto-resizing, and copy-paste capabilities between the remote-viewer client and accessing system. Spice provides also for forwarding of USB connections to the guest as well as use of local sound devices. You can run multiple console displays as well.
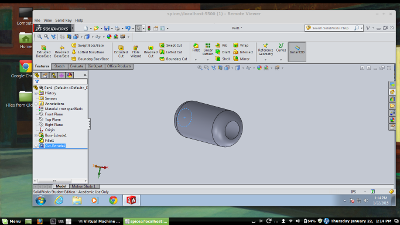
The example below is of a Windows 7 Pro 64-bit VM guest running Solid Works through a Spice VDI. The VM is running on a Linux Mint notebook with the KVM hypervisor added to it. The example is shown in windowed mode, but can run very well in auto-adjusted full screen native resolution as well.


